How to send goods you bought yourself to the JTLGO warehouse
Open Ship my goods, enter the destination, cargo and delivery address, then choose Self ship to warehouse and copy the warehouse address for the seller. After the seller ships, add each parcel's domestic tracking number to the order, and confirm when every parcel is listed.
Where to find it on the site
- Warehouse & Freight
On a phone, these are in the menu at the top right.
Have these ready
- A JTLGO account
- Your delivery address abroad
- The domestic tracking number of each parcel, once the seller ships
-
Step 1: Enter the destination and the cargo
Choose where the goods will go and what kind of goods they are, and describe them briefly.
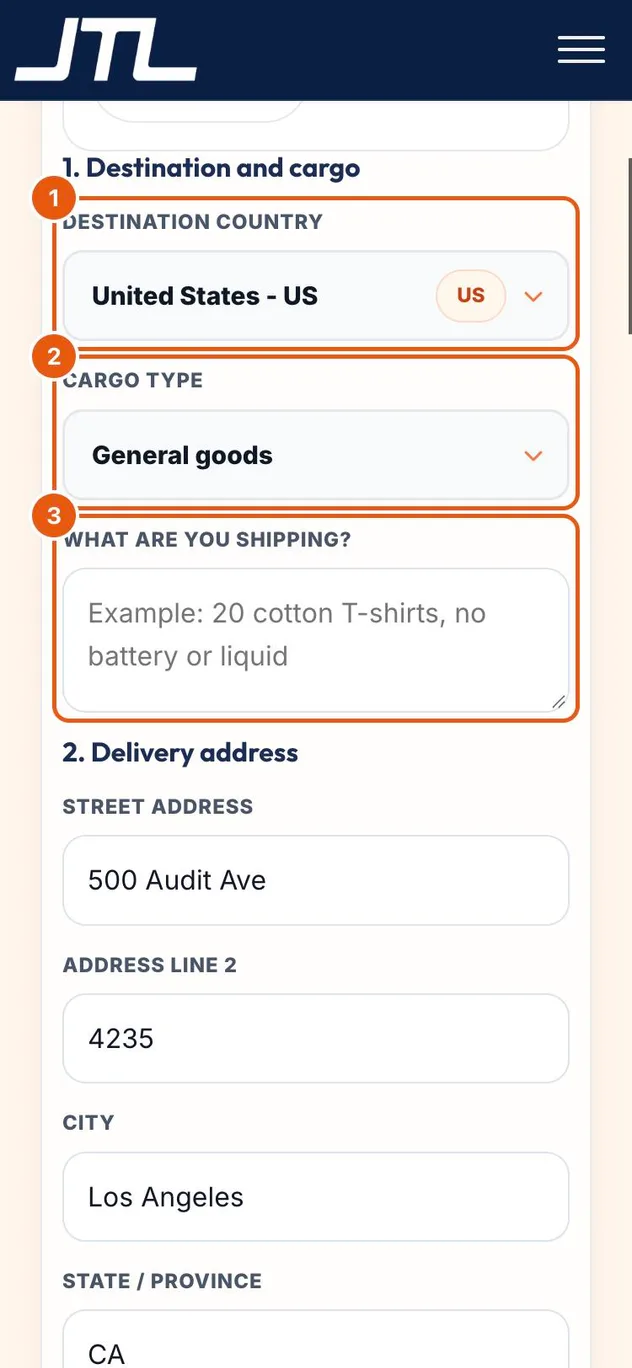
- Destination country.
- Cargo type: General goods, Sensitive goods, Battery, or Liquid / powder.
- What are you shipping: for example, 20 cotton T-shirts, no battery or liquid.
-
Step 2: Add the delivery address
If you are signed in, the address saved in your profile is filled in for you. Check it before you continue.
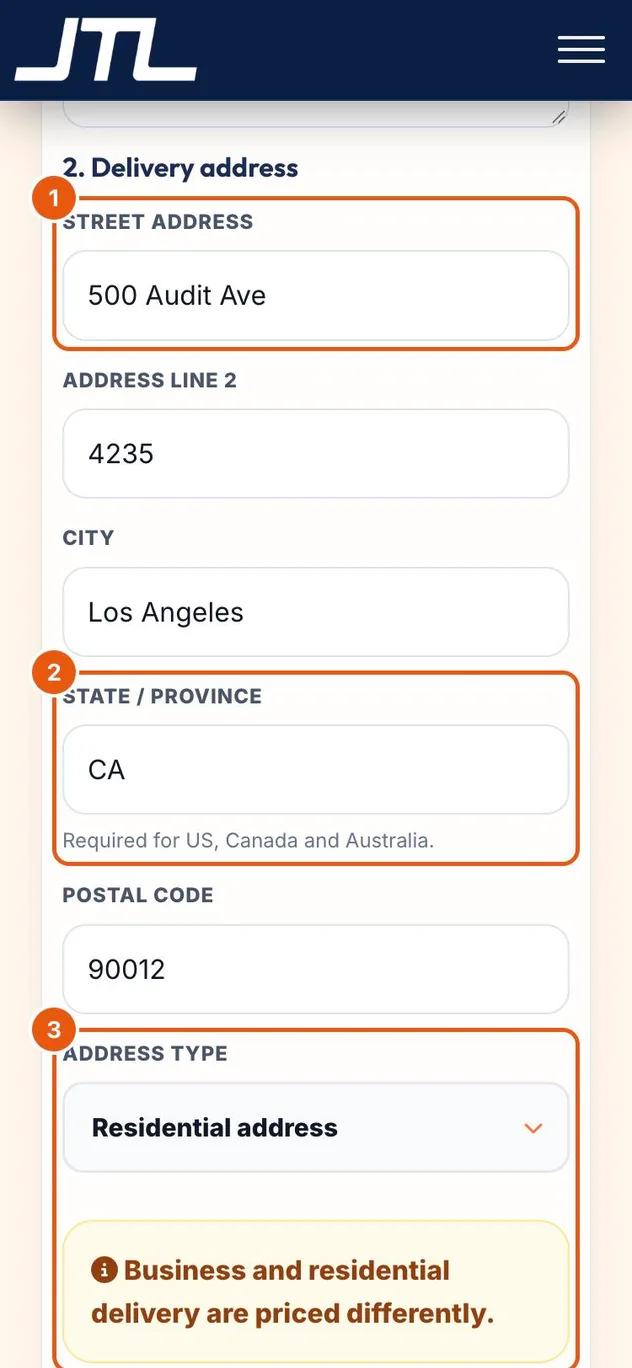
- Street address of the final recipient.
- State / Province is required for the US, Canada and Australia.
- Address type: business and residential delivery are priced differently.
-
Step 3: Get the warehouse address for the seller
Choose how the goods reach the warehouse. If you or the seller will ship them, copy the warehouse address and give it to the seller.
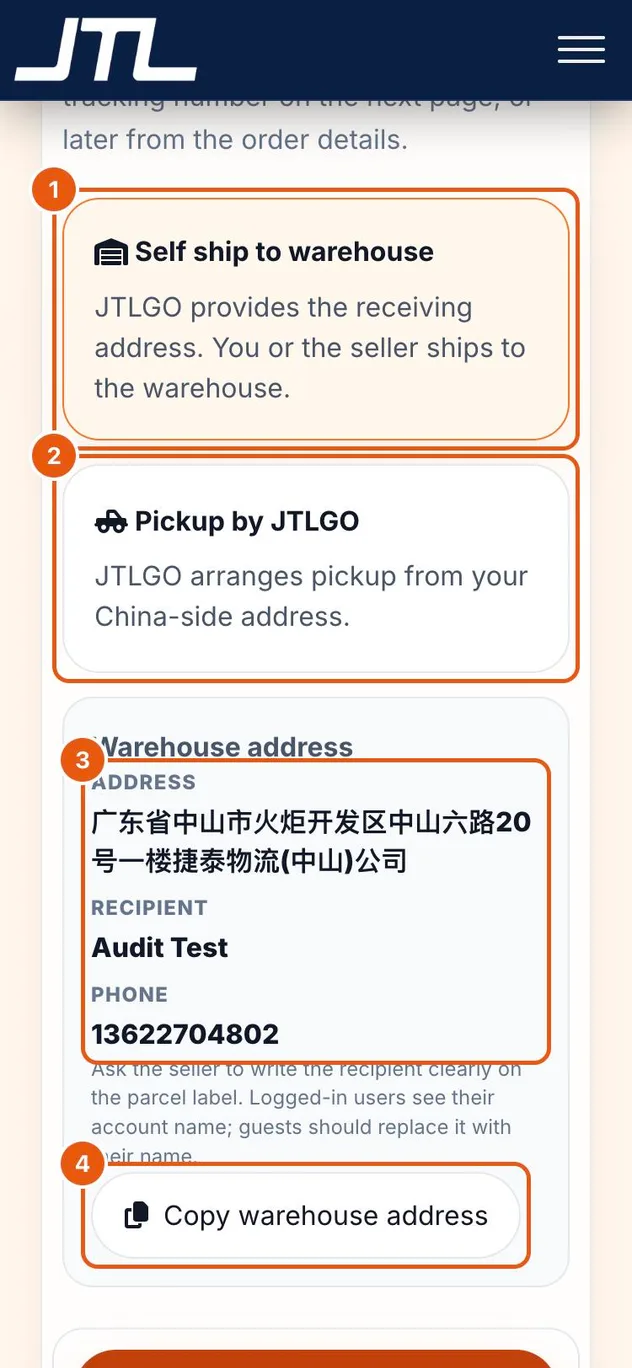
- Self ship to warehouse: JTLGO provides the receiving address and you or the seller ships to it.
- Pickup by JTLGO: JTLGO arranges pickup from your China-side address.
- The warehouse address. The recipient is your account name; ask the seller to write it clearly on the parcel label.
- Copy warehouse address copies it in one tap.
Tip: You can add tracking numbers on the next page, or later from the order details.
-
Step 4: Add each parcel's tracking number
When the seller has shipped, open the order with Details and go to Warehouse inbound. Add one tracking number per parcel.
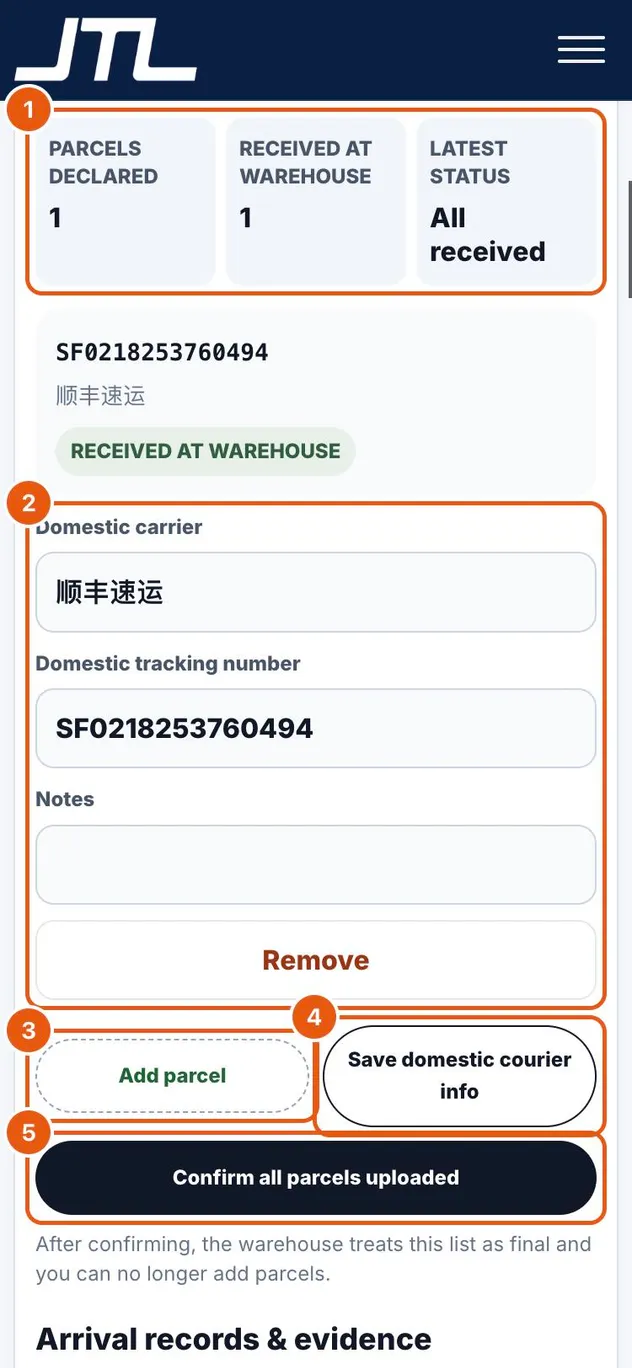
- Parcels declared, parcels received at the warehouse, and the latest status.
- For each parcel: the domestic carrier, the tracking number and any notes.
- Add parcel adds another row for the next parcel.
- Save domestic courier info saves what you entered.
- Confirm all parcels uploaded tells the warehouse the list is complete. After this you can no longer add parcels.
What happens next
As parcels arrive, Warehouse inbound shows the arrival time and the warehouse evidence for each one. Dimensions and weight are measured when the packing result is verified, and the final bill follows from those cartons.
Common questions
Whose name goes on the parcel?
Use the recipient shown with the warehouse address. Signed-in customers see their account name there; guests should replace it with their own name.
Can I add tracking numbers later?
Yes. Add them from the order details at any time until you confirm that all parcels are uploaded.
What if I confirmed too early?
After confirming, the warehouse treats the list as final and you cannot add parcels. Contact support with the order number and the missing tracking number.
Related
Was this page helpful?
Still stuck? Send us a link to this page and tell us which step you’re on.
Contact support